Many times it gets tiring and tedious to look for ways to allocate ram to your games for a better experience. Minecraft becomes a whole new experience after this. Allocate more RAM to Minecraft is a simple task if you follow some easy steps. Today, in this article, we will talk about some easy ways to Allocate More RAM to Minecraft. It can be a very easy and hassle-free task Allocating RAM to Minecraft. All you have to do is to follow the description mentioned in this article. So, let’s get started!
How to Allocate More RAM to Minecraft?
Before we begin telling you about the various ways to allocate RAM to your game, let us first see whether your PC has enough RAM to spare or not. This can be figured out in some simple steps. Let us have a look at them:
To know how much RAM does your PC hold, follow the steps mentioned below:
- Click on the Start button on your PC.
- Next, go to Settings and click About.
- Under the Device Specification section, find Installed RAM.
- Alongside that will be the storage of RAM.
Minecraft usually requires about 2GB of RAM, so if you have a 4GB surplus of it, you are good to go.
1. Allocating RAM from Default Launcher
To allocate RAM from Default Launcher, you need to go through the Minecraft Default Launcher. To do so, follow the below-mentioned instructions:
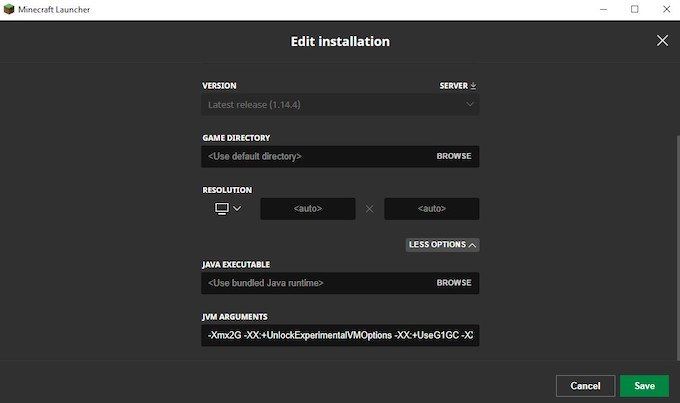
- Firstly, open Minecraft Launcher and choose the version you want to play.
- Next, go to the installation options from the tabs. You will see a set of releases.
- Click on the three-dotted menu and click on Edit.
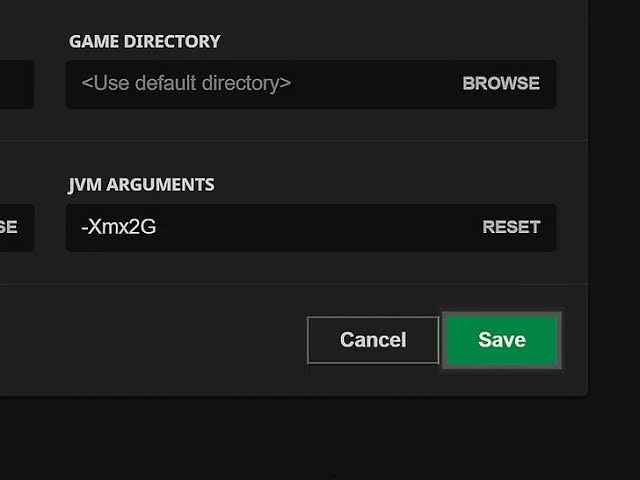
- Next, click on More Options and click JVM Arguments.
- You will get codes in the box starting like- Xmx2G. The number towards the end is the amount of RAM Minecraft uses.
- The number can be changed according to your wish.
- After completion of these steps, click Save.
You are good to go now. This is how you can Allocate More RAM to Minecraft using Default Launcher.
2. Allocate RAM from ATLauncher
Users who have played SkyFactor or downloaded mods are familiar with ATLauncher. Using it makes the whole process, even more, easier for you. We will explain in a step-by-step method how this can be used.
- Firstly, set up the ATLauncher on your PC.
- Next, open the list of options and click on Settings.
- Now click on Java/Minecraft on top of the screen.
- Choose the Maximum Memory/RAM option from there.
- You can either type the number or scroll through the numbers.
- Click on the Save option and you are all set now to play the game with additional RAM.
3. Allocate RAM using Twitch/Curse Launcher
Apart from being a way to play Minecraft, it is also a way to Allocate More RAM to Minecraft. It is very similar to the ATLauncher and all you need to do is follow some simple steps to get started. It won’t be much of a trouble and will be hassle-free too.

- Open the Twitch Launcher and click on the three lines in the corner.
- Next, click on Files and go to Settings.
- Now, search the Minecraft section in the settings. You will find the Java section there.
- Under that option, you will find the Allocated Memory option. Slide it to the digit that you want.
- Now, you can simply go back to the mods and choose the Minecraft option.
- You are all set to play the Minecraft game with your friends with a new and better experience.
4. Allocate RAM using Technic Launcher
Technic Launcher is very similar to the ATLauncher. It is a popular launcher used to install heavy Minecraft mods. Since it has a very easy user interface, it is not that big of an issue to use it to Allocate More RAM to Minecraft. You just need to follow some simple steps to get started.
- Launch the Technic Launcher and search for the Settings option in the top corner.
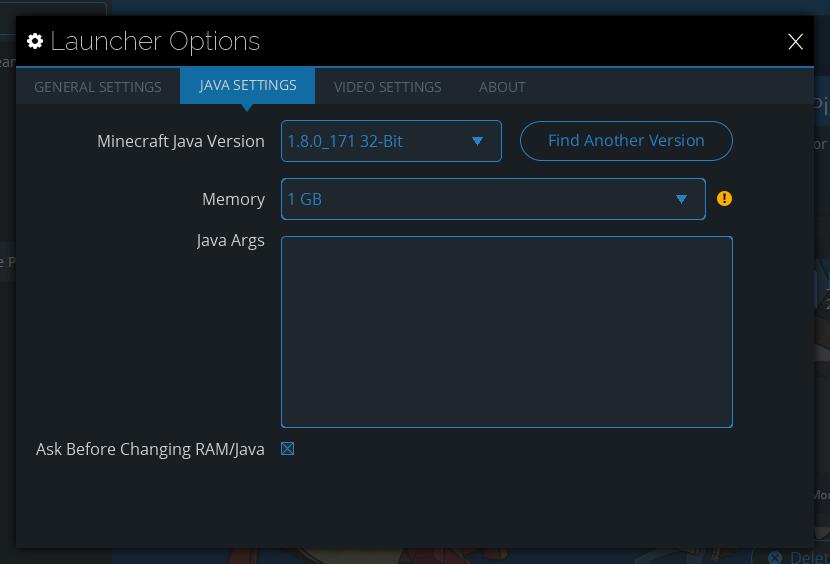
- Click on the icon and click on the Java Settings option.
- A drop-down menu labeled Memory will appear in front of you. Click on it and choose your desired memory allocation. Keep in mind that you need at least 4GB of RAM for a game.
- Your changes will be saved. Wait for a few minutes before exiting and closing the Technic Launcher.
You are good to go now. You can play Minecraft with added memory and have fun with your friends.
It is a matter of importance to let our readers know that, allocating an excess of RAM is also not suitable for the game. The overall performance of your Minecraft game can decrease ultimately because of this. In most cases tho, the outcomes will be positive.
Keeping in mind the total amount of RAM in your device, you must also take care of the fact that there should be enough spare RAM for other uses on your device. So, for this purpose, make sure to have at least 1GB of RAM as extra in your phone for other purposes.
Conclusion
This was all the information we could provide you about how to Allocate RAM to the Minecraft game. Let us know in the comments section below which method helped you and you liked the most. Minecraft is an extensively detailed game.
With this article, you can now effortlessly play the game and impress your friends. Let us know in the comments how you liked the article and if you have any suggestions please add them too!